
Face Sculpting for Round Faces
Quick Answer: To sculpt a round face with makeup, use a matte contour shade in the hollows of the cheeks, along the sides of the forehead, and under the jawline, then apply highlighter to the center of the face to draw the eye inward and create the illusion of more definition.
Face sculpting for round faces works best when it creates gentle dimension rather than harsh lines. The goal is not to make your face look like a different shape. It is to add structure, lift, and balance so features look more defined. The most flattering sculpting on round faces usually comes from strategic contour, lifted blush placement, and smart powder use.
Round faces often have softer edges, fuller cheeks, and similar width and length proportions. That softness is beautiful, but it also means contour placement matters. If contour sits too low or too horizontal, it can make the face look wider instead of more sculpted.
What Defines a Round Face in Makeup Terms?
In makeup, a round face usually has:
- Fuller cheeks
- A softer jawline
- Less naturally sharp cheekbone definition
- Similar face width and length
That means sculpting should visually create vertical lift and selective shadow.
Best Contour Placement for Round Faces
Place Contour Slightly Higher
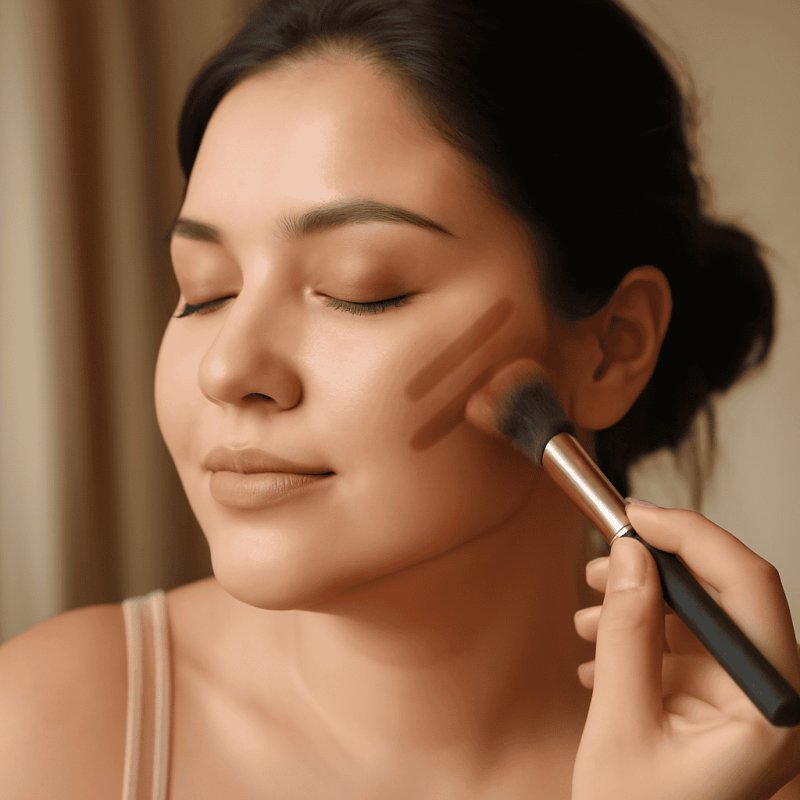
One of the most helpful tricks is lifting contour placement a little higher than you might expect. Instead of dragging product down toward the mouth, keep it focused under the cheekbone and blend upward.
This creates the illusion of lift rather than heaviness.
Focus the Sides of the Face Selectively
A small amount of contour at the temples and upper perimeter of the forehead can help create a more elongated look. Along the jawline, use restraint. Too much contour there can look muddy fast.
Keep the Center of the Face Brighter
A brighter center draws the eye inward and upward. Light concealer under the eyes, around the center forehead, and lightly around the chin can support the sculpted effect without looking dramatic.
Powder vs Cream Products for Sculpting
Both textures can work, but the finish matters.
Powder Sculpting Products
Powder contour or bronzing products are easier for many people to control. They blend softly, especially on top of set foundation, and can be built up gradually.
Cream Sculpting Products
Creams can look very skin-like, but they need careful blending. If you use cream contour on a round face, keep placement tight and lifted before setting it.
Which One Is Better?
If you want subtle, everyday definition, powder sculpting products are often the easiest choice. They are forgiving and pair well with strategic setting powder.
Blush Placement Matters More Than People Think
Blush can either support sculpting or work against it.
Apply Blush Upward, Not Straight Across
For round faces, blush looks most flattering when it is placed a bit higher on the cheeks and blended toward the temples. A horizontal blush placement can emphasize facial width.
Pair Blush With Contour, Not Over It
Let the contour create shadow first, then place blush slightly above or blending into it. This gives a lifted, cohesive effect.
How Setting Powder Helps the Sculpted Look
Setting powder is not just about shine. It helps preserve the shape you create.
Set the Areas You Brighten
Use a light powder under the eyes and around the center of the face to keep those areas smooth and bright.
Keep the Outer Face Softly Mattified
If the perimeter gets oily, contour can lose definition. A soft-matte powder around the sides of the face can help the sculpting stay cleaner for longer.
Don’t Over-Powder the Cheeks
Too much powder over contour and blush can flatten the whole effect. Use enough to set, not enough to erase dimension.
Common Sculpting Mistakes for Round Faces
Pulling Contour Too Low
This is the most common issue. Low contour drags the face downward and makes the cheeks look heavier.
Using Very Cool, Heavy Shades
A contour that is too gray or too dark can look unnatural. Soft neutral-to-cool tones usually work better than aggressive deep stripes.
Making Everything Symmetrical and Flat
Real faces are dimensional. Leave some softness. The best sculpting is noticeable as polish, not as obvious product.
A Simple Sculpting Routine for Round Faces
Step 1: Base
Apply foundation or skin tint and blend evenly.
Step 2: Brighten
Add concealer under the eyes and lightly in the center of the face.
Step 3: Sculpt
Place contour at the upper cheek hollows, temples, and very lightly around the perimeter if needed.
Step 4: Blush
Blend blush upward toward the temples.
Step 5: Set
Use setting powder lightly on brightened areas and any zones prone to shine.
Key Takeaways
- Matte contour products create shadow that recedes; avoid shimmer contour products that draw attention rather than receding.
- Blending contour upward and outward toward the temples creates a lifted, elongated effect more flattering than pulling contour straight down.
- Blush placement on round faces works best on the upper cheekbone and temples rather than the apple of the cheeks, which emphasizes roundness.
- A longer, more vertical nose highlight can visually elongate the face, counteracting the horizontal width effect of a rounder shape.
- Over-contouring is easy to spot and looks heavy in daylight – build gradually and check in natural light.
Understanding Why Round Faces Need Different Contouring
Round faces are characterized by similar width and length measurements, with fuller cheeks and a softly curved jawline. Makeup can manipulate where the eye is drawn by creating artificial shadows (contour) and light (highlight), effectively reshaping the visual geometry. The goal for round face contouring is typically to create the perception of more vertical length while adding definition to the cheekbones and jaw.
Where to Place Contour on a Round Face
- Cheek hollows: Suck in cheeks slightly to find the natural hollow. Apply contour starting at the ear and blending inward – but stop before reaching the center of the face.
- Temples: Lightly contour around the outer edge of the forehead and into the temples to reduce perceived width at the top of the face.
- Jawline: A light application of contour just below the jawline and along the sides of the chin can give the impression of a more defined jaw.
- Sides of the nose: Optional – a thin stripe of contour on each side narrows the nose and adds subtle vertical emphasis.
Highlight Placement for Round Faces
- Top of cheekbones: A stripe of highlight across the highest point looks lifted and defined.
- Center forehead to bridge of nose: A thin stripe down the center creates a visual vertical axis that makes the face appear longer.
- Cupid’s bow: Drawing attention to the center of the face can visually elongate the area between nose and mouth.
Blush for Round Faces
Traditional blush placement on the apple of the cheeks emphasizes width. For round face shapes, place blush higher – on the cheekbone itself – and sweep it diagonally up toward the temples. This creates a lifting, angular effect. Avoid very circular blush application, which mirrors and reinforces the round face shape.
FAQ
How do you contour a round face naturally?
Contour a round face naturally by placing product slightly higher under the cheekbones, blending upward, and keeping the center of the face brighter to create lift and definition.
Where should blush go on a round face?
Blush should generally sit higher on the cheeks and blend toward the temples rather than straight across the face.
Is powder contour or cream contour better for round faces?
Both can work, but powder contour is often easier to control for subtle, everyday sculpting on round faces.
Does setting powder help contour last longer?
Yes. Setting powder helps lock in brightened areas, reduce shine, and keep the overall sculpted shape looking clean through the day.
Sources
- U.S. Food and Drug Administration. Cosmetics labeling guide.
- Environmental Working Group. Skin Deep cosmetic ingredient safety database.
- European Commission. CosIng: cosmetic ingredient database.
- Reviews on talc in cosmetics and safety considerations. PubMed search.
- Reviews on silica in cosmetic powders and safety. PubMed search.
Related Articles
- Loose Powder vs Pressed Powder
- Best Powders for Oily Skin Without Cakiness
- Suede Bronzer vs Cream Bronzer
- How to Apply Bronzer Naturally
- Mature Skin Makeup Guide
📚 Part of our Best Setting Powders & Sculpting hub. Explore all our powder and sculpting guides.

Leave a Reply